This JustRite "With Sympathy" is the card that was designed for the Fond Memories Workshop. Hope you enjoy.
Directions:
**Mask off the leaves on the left flower . Using the Tuxedo Black prepare the image to stamp. Remove the masking tape and stamp on the Classic Oval largest die (2.75 x 3.75).
**Color the flower with YR 27 shading portions darker than others. By going over an area more than once will make the image darker. Color the leaves starting with the YG 95 on the veins and finishing with YG 93.
**Spray Goose Bumps 2-3 mists from 12 inches on the flower image. Let Dry. When dry Distress with the Vintage Photo
**Mount the Kaisercraft “Tradition” on the Kaisercraft “Reunion” floral side.
**Stamp the sentiment on the Memory Box die and Distress with Vintage Photo.
**Wrap the Twine around the card 3 or 4 times. Add the tag and tie a small bow on the right side of the card.
**Mount the stamped image on Kaisercraft Reunion (solid side) that was cut with the JustRite Custom Die #5 (being the largest).
**Mount the assembled card on the card base.
Supplies and Paper Cuts:
Paper: Neenah Solar White (for stamping )
Royal Fiber Birch cut to 5.5 x 8.5 (card base)
Kaisercraft These Days “Reunion” cut to 4.25 x 5.5
Kaisercraft These Days “ Tradition” cut to 3.75 x 5
Ink: Memento Tuxedo Black
Distress Ink: Vintage Photo
Twine: 30 inches
Eclipse masking tape
Dies: Justrite Custom Die
Spellbinder Classic Oval large
Memory Box Tags
Copic Markers: YR27, YG 93, YG95
Goose Bumps Spray


 JustRite is hosting a color challenge this week. Not having the colors I needed in designer papers I decided to use Copic Markers and the JustRite "With sympathy" set to create this card. The card began with a 5 x 7 base that was airbrushed with Copic YR 31. On this was mounted the background that was embossed with the new Spellbinder M-Bossabilities "Imperial" folder.This was airbrushed with both the YR31 and YR65. Pearl Gems were added to this base. The flower was stamped on a Spellbinder Classic Oval and colored with Copic Markers YR31 (Lt Reddish Yellow) and RV14 (Begonia Pink) as the tip color. I did mask off a portion of the stamp to fit the oval. These were blended which gave a little different color to the flower. YG 61and YG63 were used on the leaves. This was framed with the new Spellbinder "Floral Oval" using Neenah Solar White. Small pearl gems were added to the frame. A Spellbinder ribbon tag was cut and stamped with a sentiment from the JustRite Set and airbrushed with the YR31. Butterflies were cut with a Memory Box die and colored using the three challenge colors. When I started this was a challenge, but with white paper, an embossing folder, the right stamp, a few pearl gems and some dies it became a card. Hope you enjoy.
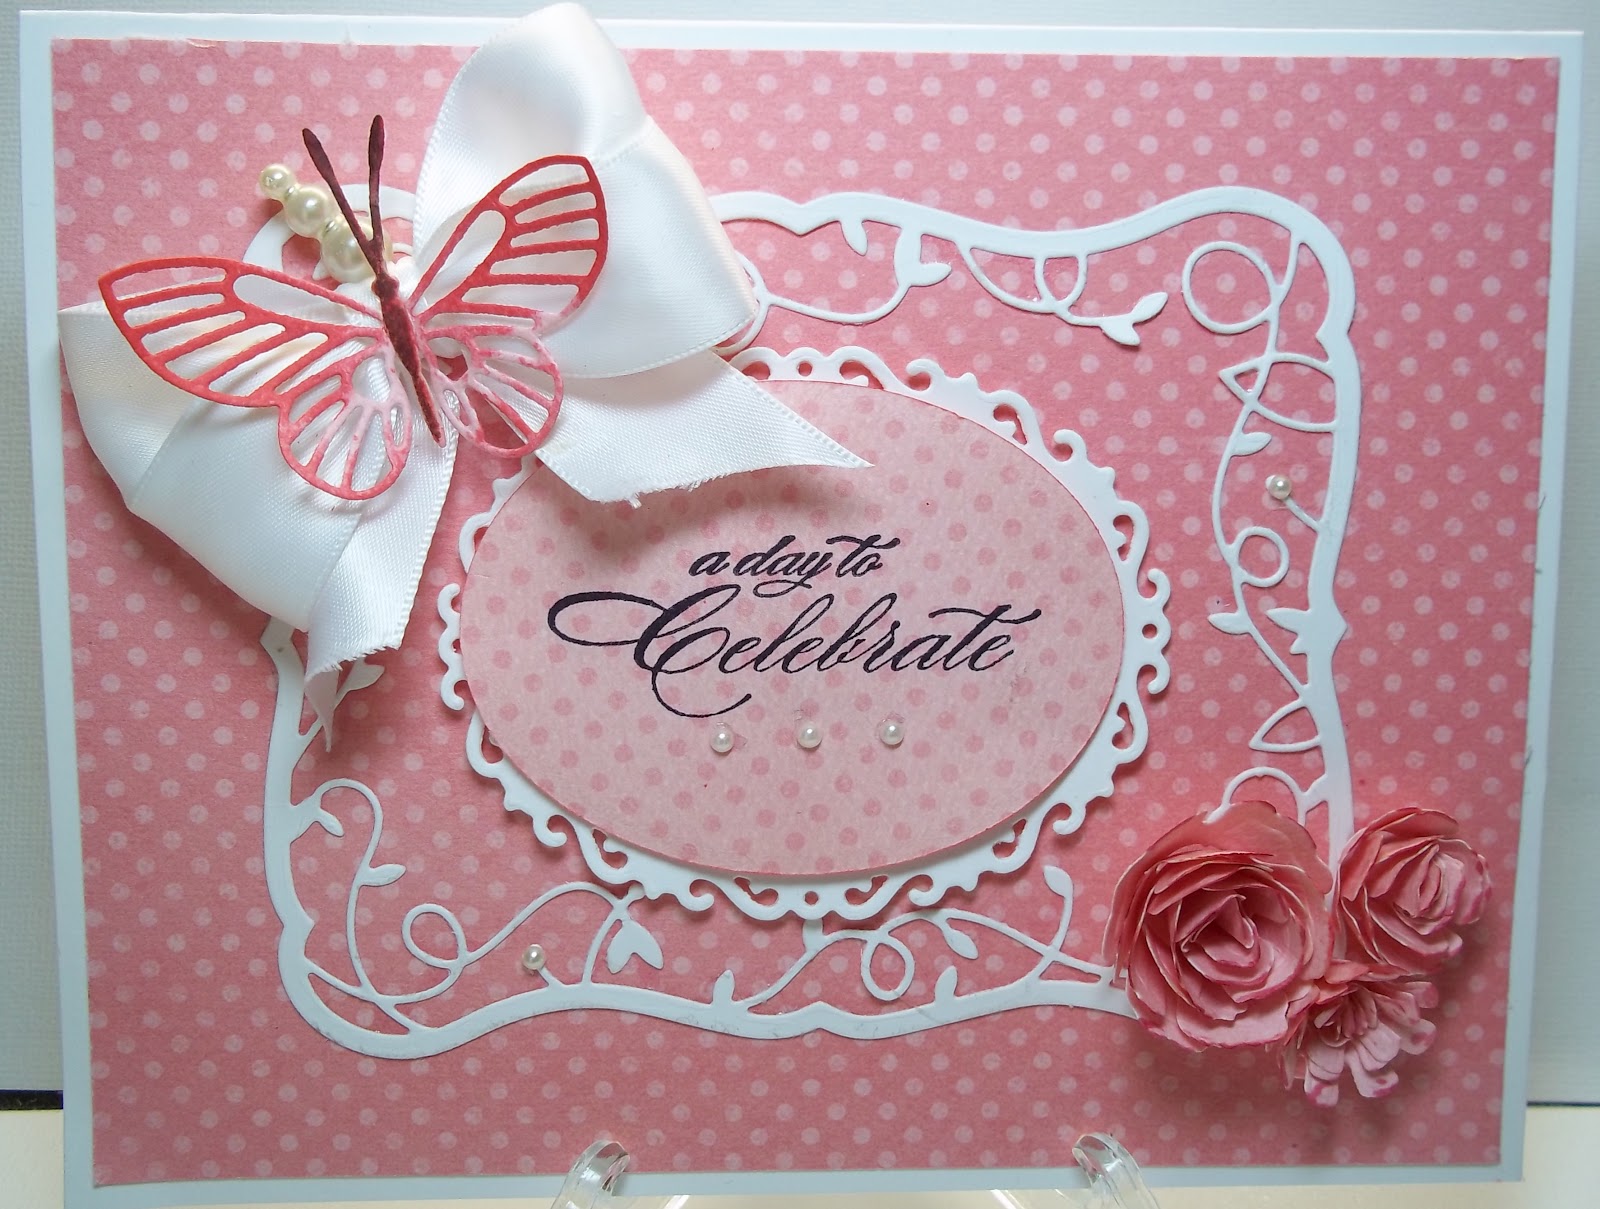

 Wanting to make something a little different I looked at Joan"s Garden Challenge for this week and here it is. The challenge is to use flowers and make a pretty card. I hope you can see the many flowers in the design of the card. I started with Bo Bunny "Back to Basics" paper and a die from Memory Box "Twirling Vine Frame (cut in white). Very small pearls were added on what appears to be small flowers on the frame. The card itself is a 5 x 7 in size. The flowers are from the same paper using a Spellbinder Die "bitty blossoms". The flowers were tipped with a Copic Marker R85. The sentiment from Penny Black "Gratitude" was stamped on another Bo Bunny "Back to Basics" paper and edged with the Distress marker Worn Lipstick. The paper was cut with a Spellbinder oval and placed on top of a Spellbinder "Floral" oval cut from white. Three pearls were added to finish off the oval. A butterfly was cut with a Memory Box die from the DP and distressed with Worn Lipstick Distress Stain . The center of the butterfly was distressed with an distress marker. This was placed on a silk bow and a pearl pin added. Close ups can be seen of both the butterfly and the flowers (taken from a top view). This was fun to make. Hope you enjoy.

