
Showing posts with label Bazzill. Show all posts
Showing posts with label Bazzill. Show all posts
Saturday, November 9, 2013
Tis the Season

Saturday, January 12, 2013
Your so Sweet

Wednesday, November 21, 2012
Joy, Jolly, Peace

Saturday, October 6, 2012
Petal Party

Friday, October 5, 2012
Gatefold card

Supplies:
Bazzill Kraft paper (cut 6x12)
(square cut 4.5 x 4.5)
Bazzill Teal
(cut 4.75 x 4.75) (center
will be used to cut 2 5/8 square)
Bazzill Cream
(cut 3 x 6) and (3.75 x 3.75) and a scrap for filigree
Spellbinder
Die: Majestic Marvelous Squares
Memory
Box flower
Spellbinder
Garden Lattice M-Bossabilities Folder
Ranger
Distress Antique Linen
Kaiser
and Hero Arts Pearl Gems
Pop
Dots or 3M tape
1. Take your 6 x 12 Kraft paper and score
at 3 inches and 9 inches to form a 6 x 6 base
2. With the 3 x 6 Cream emboss with the
Garden Lattice and distress with Antique Linen (optional). Attach this to the right front side
3. Cut the Teal 4.75 square and Kraft 4.5
square. Using Spellbinder
Marvelous Square #6 (largest) align so the Teal forms a border around the Kraft
square. Use a repositionable tape
over the dies and paper in order to cut both at the same time. Adhere the Kraft to the teal. Apply tape to the left side, top edge
and bottom edge for about 2
inches. Adhere to the card base on
the left.
4. Cut the 3.5 Cream square with Die # 5 with the decorative edge. Apply
tape to the right side, and adhere to the right side of the card. Place a Kaiser Craft gem in each corner.
5. With the teal left from the center of
the card cut Die #4 (2 5/8 square) centering it. Follow this by embossing with Die # 3 (2.25 square). Adhere this to the Cream center using
pop dots. The left over Teal can
be used in the center of the card to frame a sentiment.
6. Cut the flower from cream with the
Memory Box Die. Pop dot this to
the teal. Add the Hero Arts Gem
7. With scraps of Cream cut the #3 die for
the filigree. Place one in the
upper left corner and the other in the lower right. Add a pearl gem.
Sunday, August 19, 2012
Winter Scene

Sunday, August 12, 2012
Let it snow??

Saturday, January 14, 2012
A simple card

Tuesday, October 11, 2011
Window card

In some browsers this and a previous post are showing together. The card from one and the supplies from another.
This is another card I created for the Fall Fond Memories workshop. It is an acetate window card. The snowman is stamped on the inside. I took an online card class this past summer and the acetate card was one that was highlighted. Winter Wishes was stamped on the acetate which created the window. A Fiskars stamp press was used so that the pressure was even. Post It notes held the acetate down as it was being stamped. The stamped image is on the inside colored with Prismacolor pencils. Flowersoft mixed with glitter was used as the snow that the snowman sits in. I thought it would be a fun technique to share. Hope you enjoy.Supplies:
Stamps: JustRite Blizzard Bunch and Christmas Mini Sentiments.
Paper: Graphic 45 Christmas Emporium collection, (4.5 x 6) Believe and Bazzill: Night Mist (3.5 x 4.5), White Vellum, Bazzill . Cardstock, white 4.5 by 12
Ink: Stazon Black and Memento Black
Prismacolor Pencils: Red, greens, blues, orange, browns
Accessories: Flowersoft White and Glitter Hero Arts Pearls, Acetate 2 ¾ x 3.5, Gamsol and stumps
Spellbinder: Labels 23 and 2011 Snowflake Pendants
Monday, September 26, 2011
snowflake and holly

Sunday, January 16, 2011
Explosion Box

Hopefully from the picture you can see I had to to scor at the 4 inch marks and then at a diagonal on the corners so the 12 x 12 will fold into a box shape. The top was cut as a 6 1/8 square and scored at one inch on all four sides to make the lid slightly larger than the box. I used Scor Tape to assemble this project.
TOP: Stamp sets that were used for the top of the box are from JustRite: You Inspire Me stamped and edged with Memento Rich Cocoa and cut with Spellbinder circles. I stamped JustRite's Happy Everything Tag kit "Happy Valentines Day" and cut it with the tag from the set. I created a cream border on the edge of the top with the Martha Stewart punch.

 INSIDE: I used Bazzill flowers which were colored using my Copic Air Brush System , layered and attached with a brad by Bo Bunny. A tag " Be Mine" was stamped using the JustRite Myriad Pro Font set. I added little pockets on each of the sides that hold little cards that can be used for a variety of gift ideas. I used the Martha Steward punch on the pockets too.
Monday, June 28, 2010
Celebrate

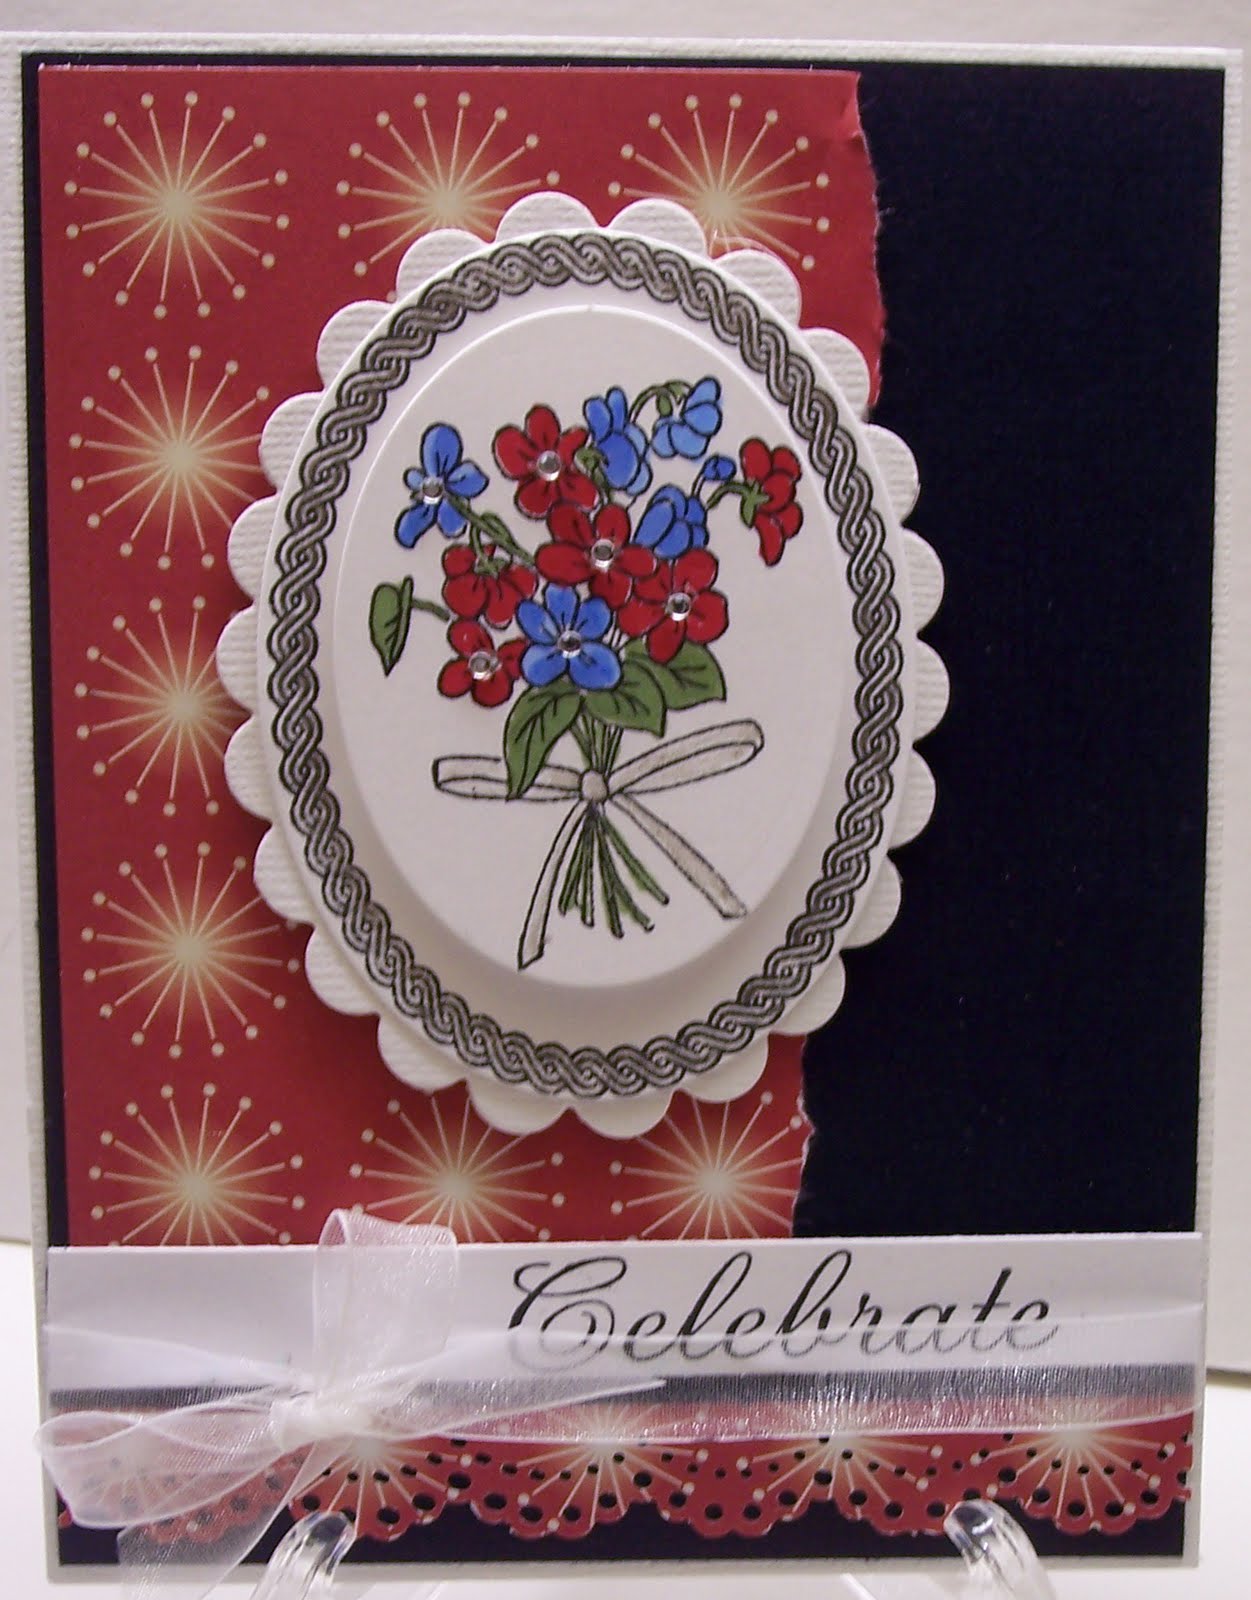 For the JustRite Friday Challenge # 24. To make this card we were to use Red, White and Blue paper and oval sets from JustRite. So I used JustRite's all Occasion Nested Sentiments stamping it on a strip of white and the Breath of Spring oval to make this fun little card. The layout made it simple to assemble using Cosmo Cricket's Garden Variety Sunday picnic paper along with Bazzill white and dark blue. I stamped the flowers with Momento Black and colored with Copic Markers. I cut the flower with a Spellbinder oval and foam mounted on the border that was cut with an oval too. I mounted these on a Spellbinder scallop oval. A little gemstone by Hero Arts added a center to the flowers. A glimmer pen added a little shimmer to the border and ribbon on the flowers. From my stash ribbon was added to the strip created with a Martha Stewart punch to finish out this card. Perhaps it can be for the Fourth of July, a birthday or other special occasion. Hope you enjoy my multi-purpose card.
Subscribe to:
Posts (Atom)